Gamifying your community is a great way to increase engagement, adoption, and advocacy. Using badges based on activity is a great way to visually reward community members for their participation and to promote MVPs in your community.
|
According to Accredible: "Learners that have a greater motivation to learn and increased engagement with their materials do better in their results. A ScienceDirect study from 2020 revealed two key statistics to support this:
Additionally, a study by Intuition in 2019 reported 67% of students stated gamified learning increased user engagement and motivation compared to traditional learning materials." |
Here's how you can gamify your community using badges.
Overview:
Out-of-the-box badges
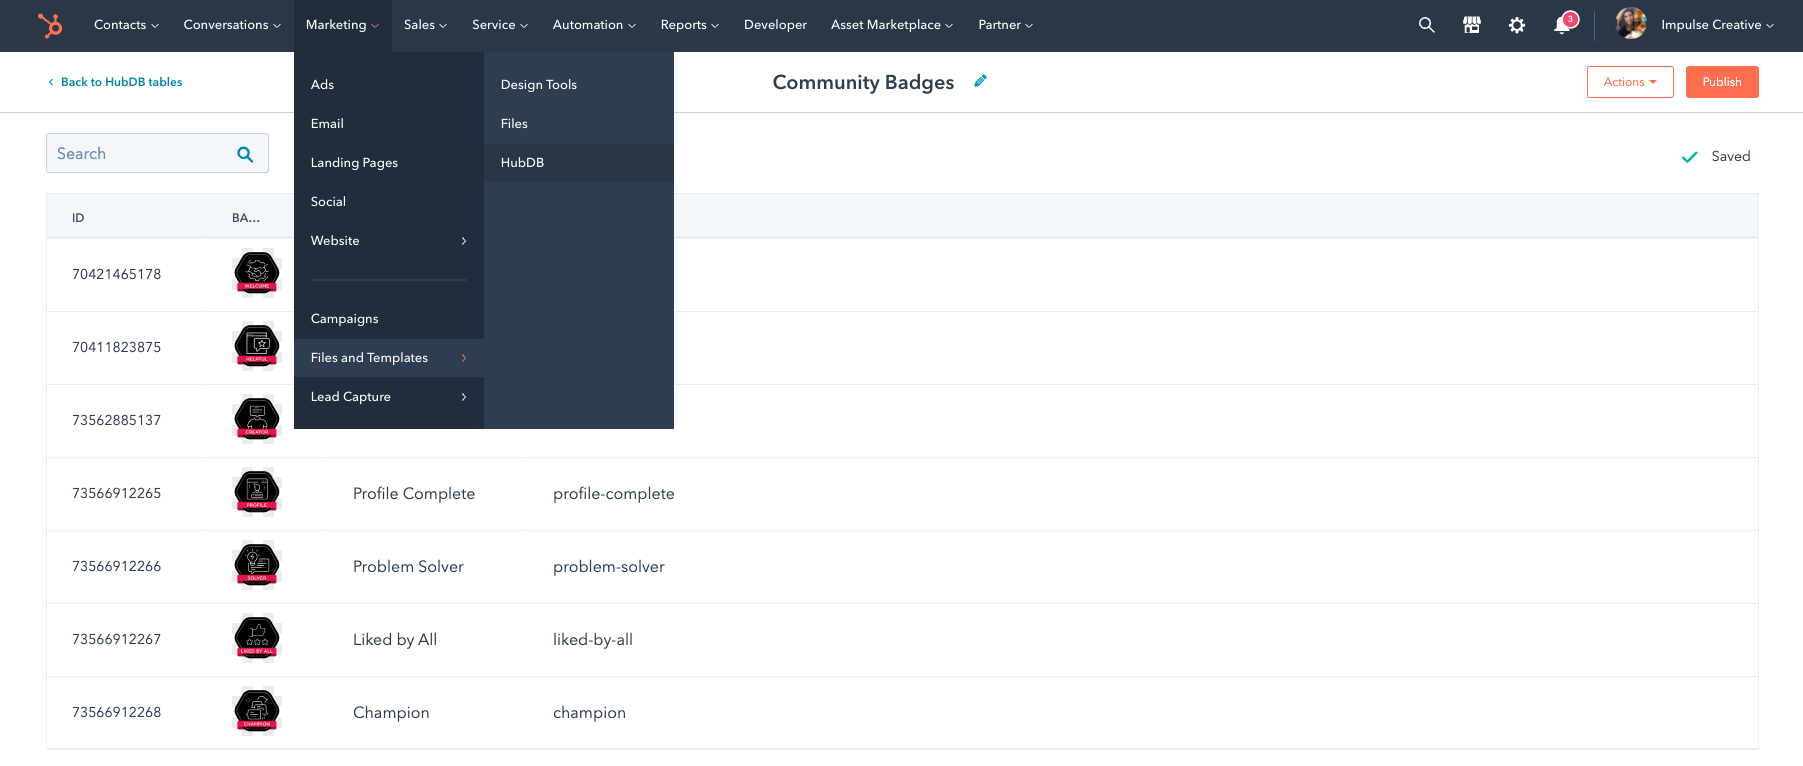
Out-of-the-box, your community has seven badges pre-populated and ready to use. To see these go to Marketing > Files and Templates > HubDB and open the HubDB table named Community Badges (shown below).

Your badge inventory:
| Badge Name: | Example Use Case: |
| Welcome | Joined the community (all members) |
| Helpful | Created a reply that was marked as a solution |
| Creator | Created a new topic to start a conversation |
| Profile Complete | Completed all fields of their Member Profile |
| Problem Solver | Has 10 Replies marked as a solution |
| Liked by All | Has the most upvotes |
| Champion | Has a top 10 member score |
Special Note: You can redefine use cases for these default badges however you'd like. Keep reading for more.
How to add/edit badges
If you would like to add or edit badges available to your community members.
Add a New Badge:
- Add to Community Badges HubDB Table:
- Click the + Add row button at the bottom left corner of the Community Badges HubDB table and add the badge image, badge name, and slug.
- Click the + Add row button at the bottom left corner of the Community Badges HubDB table and add the badge image, badge name, and slug.
 You will also need to add any new badges to the Member Profile property: Badges.
- Navigate to Settings > Properties > Select an object: Member Profile Properties > Badges > Edit
- The Label will be what you see in the CRM in Member Profiles and what you will use for automating badge awards
- Make sure the Internal Value matches the Slug in your HubDB table
- If you delete any of the default badges in your HubDB table, make sure you delete them here too.
Edit an Existing Badge:
To edit an existing badge you will need to go through the same steps above, editing the badge image or name in the existing row of your Community Badges HubDB table and the label in the Badges property in the Member Profiles object.
How to award badges
You can manually award badges and automate badge awards.
 Manually Award Badges:
From a community member's Member Profile, use the property Badges to select what badge(s) you'd like to award to that member.
You can select multiple badges.
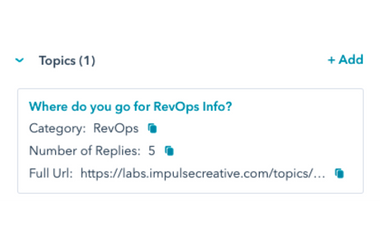
Click save after selecting badges from the dropdown and these will automatically show on that community member's profile. To see it quickly, scroll down to "Full Url" and click

Their Member Profile will open on a new tab.

Automate Badge Awards:
To create set-it-and-forget-it badge automation, you'll need to create a workflow for each badge based on the criteria you set.
- Example 1: if you want to automate the "Profile Complete" badge, you will create a workflow that triggers when all of the properties you want to be filled out on your Member Profiles are completed. You can do this with a list or set all of the fields in the enrollment trigger of your Member Profile-based workflow.
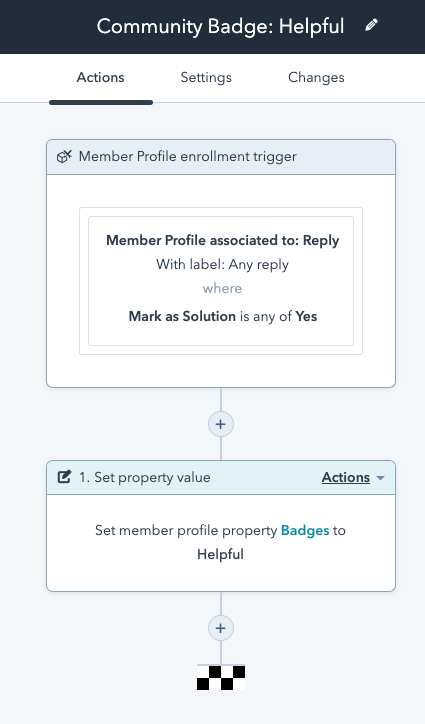
- Example 2: If you want to automate the "Helpful" badge anytime someone's reply is marked as a solution, you will create a Member Profile-based workflow, and set the enrollment criteria to any associated reply is marked as a solution. Here's what that would look like:

Remember, if you are using multiple badges, check "Append" to current value rather than "Replace" so your members can college multiple badges on their profile.
![Cohortium-Logo+tagline [for-dark-bg]](https://cohortium.io/hubfs/cohortium/Cohortium2%20(2025)/Logos/Cohortium-Logo+tagline%20%5Bfor-dark-bg%5D.png)

